 USD
USD EUR
EUR GBP
GBP CAD
CAD AUD
AUD
How To Choose The Best Clip-In Extensions?
In recent years, clip-in hair extensions have surged in popularity among women worldwide. These extensions offer a versatile, easy-to-use, and effective solution for adding volume, changing length, and experimenting with different colors and styles. Busy women can effortlessly achieve their desired looks at home, saving time and energy spent at hair salons. Clip-in extensions provide more possibilities for beauty and self-expression, allowing women to showcase different charms based on various occasions and moods.
Purchasing clip-in hair extensions online has become a trend and a worthy investment. However, not all extensions are created equal. Faced with a plethora of choices, how can you choose a product that suits you best while ensuring excellent quality? After conducting thorough user surveys and summarizing the results, we've identified four steps to help you find high-quality clip-in extensions that meet your specific needs. Additionally, we provide a professional care guide to ensure your hair stays healthy and lasts longer.

Step 1: Understanding High-Quality Clip-In Hair Extensions
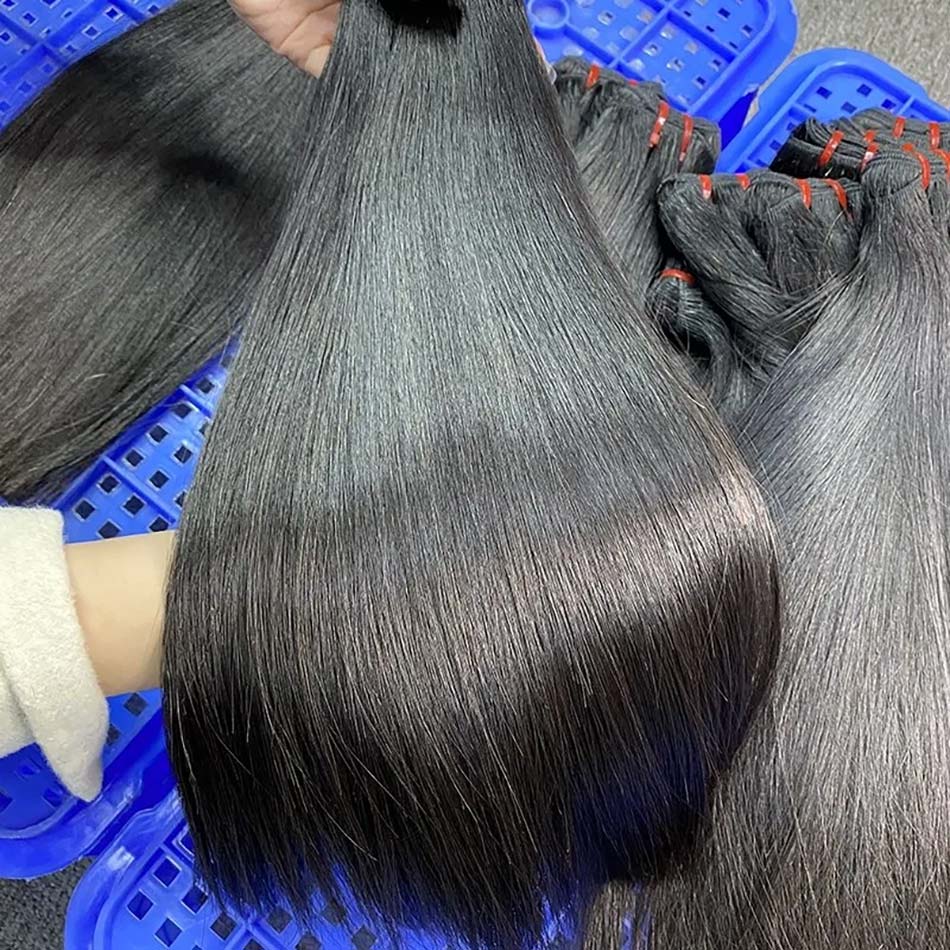
Choosing high-quality clip-in hair extensions is crucial for achieving a natural look and ensuring the longevity of the extensions. There are several factors to consider when evaluating the quality of clip-in extensions, including hair type and origin, texture, luster, feel, heat resistance, natural movements, tangling, shedding, thickness, wefts, and clips.
Hair Type and Origin: Human Hair (Virgin Hair & Remy Hair)
High-quality clip-in hair extensions are typically made from 100% human hair. Check the product description and label to confirm the hair type.
Virgin Hair: If the extensions are labeled as "virgin hair" or "Remy hair," it's a positive sign of quality. Virgin hair is unprocessed and untreated, sourced from a single donor, with all cuticles intact and aligned in the same direction. It is considered the purest form of human hair, preferred for its natural look and feel. Virgin hair comes in various textures and can be straight, wavy, curly, or kinky, depending on the donor's natural hair type. Due to its purity, virgin hair is more expensive than other types of human hair.
Remy Hair: Remy hair is also 100% human hair but may have undergone minimal processing, such as washing, conditioning, or light coloring, while preserving and aligning the cuticles. It is available in various textures and styles, similar to virgin hair. Remy hair is more affordable than virgin hair but still offers excellent quality and durability.
Texture, Luster, and Feel
The texture, luster, and feel of the hair are critical indicators of quality. High-quality extensions will have a natural shine and feel soft and smooth to the touch.
High-Quality Straight Clip-Ins: These typically have a smooth texture and natural luster, resembling healthy, well-maintained human hair. They glide easily without tangling or feeling rough, offering a realistic shine without appearing overly glossy or artificial.
High-Quality Curly Clip-Ins: These extensions mimic the natural texture of curly or wavy hair, with a realistic, slightly coarse feel. They aim to provide a soft yet textured feel that closely resembles healthy, well-maintained curly hair.
Heat Resistance and Natural Movements
Test the extensions' heat resistance by using a flat iron or curling iron on a small section. High-quality human hair should handle heat without damage.
High-Quality Straight Clip-Ins: These can withstand moderate heat styling tools like straighteners, curling irons, or blow dryers without sustaining damage. However, excessive heat can still cause damage over time. Use heat protectants and avoid excessive heat exposure to maintain the quality.
High-Quality Curly Clip-Ins: These extensions also possess good heat resistance. They tend to maintain their textured feel after washing, requiring minimal restyling. Proper care ensures they retain their curl pattern and texture well.

Less Hair Tangling and Shedding
Run your fingers through the hair gently to check for tangling and shedding. Minimal shedding is normal, but excessive tangling and shedding indicate lower quality.
High-Quality Curly Clip-Ins: These generally experience slightly more tangling and shedding than straight ones but still have minimal tangling and shedding compared to lower-quality options. Proper care and gentle handling minimize shedding.
Good Thickness
High-quality hair extensions have a consistent thickness from top to end, providing a fuller and more natural look. They maintain good volume throughout without thinning out towards the tips, indicating the hair is collected from one donor.
Flat-Sewn Wefts and Good Clips
High-quality extensions often have double wefts, with neat and secure stitching. The clips are sturdy, have a good grip, and are securely attached to the wefts. They sit flat against the head, providing extra thickness and durability.

Fair Price
While price alone is not always indicative of quality, extremely low-priced clip-in extensions might indicate inferior quality. High-quality human hair extensions often come at a moderate to higher price point.
Low-Quality Clip-Ins
Low-quality clip-ins exhibit several characteristics:
- Clips and Wefts: Single wefted, bulky, and obvious once applied.
- Thickness: Inconsistent thickness with many short pieces of hair.
- Touch and Feel: Not very soft, easily frizzy and breakable.
- Heat Resistance and Movements: Cannot take heat well, lack flexibility and bounce, feel rigid and artificial.
- Poor Thin Ends: Much thinner than the roots, with many split ends.
- Tangle and Shedding: Coarse, easily tangled, and shed excessively after a few washes.
The above gives a general view of hair quality, but how can we distinguish high-quality clip-ins? Let's explore the process of testing the quality to ensure you get a good batch.
Step 2: Testing the Hair Quality
There are various ways to test whether you've purchased a high-quality product. Check around to see what tools you have on hand, then perform the tests yourself.
Methods to Test the Quality of Clip-Ins
The Flame/Burn Test
A hair burning test determines whether hair is synthetic or made from human hair. It involves burning a small sample of the hair and observing the flame, smell, and residue.
Materials You'll Need:
- A small sample of the hair (1 or 2 strands)
- A lighter or match
- A heat-resistant surface (ceramic plate or metal tray)
- Tweezers or tongs
- Glass of water or fire extinguisher (for safety)
Steps:
- Prepare the Sample: Take a small sample of the hair. It should be clean and dry.
- Light the Hair: Hold the strand with tweezers, leaving a few inches exposed. Light the exposed end with a lighter or match.
- Observe the Flame: Human hair burns briefly with an orange flame, leaving dark ash that turns to powder when crushed. Synthetic hair burns rapidly, melts, and forms hard black beads.
- Observe the Smell: Human hair smells like burning flesh or feathers, while synthetic hair smells like burning plastic.
- Observe the Residue: Human hair leaves soft, fine, grayish-white ashes. Synthetic hair leaves hard, black, or sticky residue.
- Dispose of the Burned Hair: Extinguish the flame by dipping the burned end in water. Ensure the hair is completely extinguished and dispose of materials safely.
Heat & Wash Test
This is the easiest but best test method you can do at home. High-quality hair extensions can handle heat and revert to their original state after washing.
Heat Test
The heat test evaluates the extension's ability to withstand high temperatures from styling tools without damage. Here's how you can conduct this test:
- Select a Small Section: Choose a small, inconspicuous section of the hair extension.
- Use a Heat Styling Tool: Apply a flat iron or curling iron to the section. Set the tool to a moderate heat level, around 350-375°F (175-190°C).
- Observe the Reaction: Notice how the hair responds. High-quality human hair extensions should handle the heat without melting, frizzing, or losing their integrity.
Wash Test
The wash test assesses how the extensions hold up after washing and drying. Follow these steps:
- Wash the Extensions: Use a sulfate-free shampoo and conditioner to wash a small section of the hair extension.
- Dry Naturally: Allow the hair to air dry naturally. Avoid using excessive heat.
- Check the Texture and Quality: After drying, examine the hair for changes in texture, tangling, or shedding. High-quality extensions should maintain their original softness, smoothness, and luster.
Temperature Test
Determine whether hair feels cool or hot to touch. High-quality human hair retains moisture, feeling cool to touch. The cooler the hair feels, the higher the quality.
Bleach & Color Test
The bleach test helps recognize the quality of hair extensions. Virgin hair should start turning orange or yellowish within the suggested bleach time frame.
Materials You'll Need:
- A small sample of the hair (1 or 2 strands)
- Bleaching kit (bleach powder and developer)
- Gloves
- Mixing bowl and brush
- Foil or plastic wrap
- Timer
Steps:
- Prepare the Sample: Take a small sample of the hair. It should be clean and dry.
- Mix the Bleach: Follow the instructions on the bleaching kit to mix the bleach powder and developer in a bowl.
- Apply the Bleach: Apply the bleach mixture to the hair sample using a brush. Ensure the hair is fully saturated.
- Wrap and Wait: Wrap the bleached hair sample in foil or plastic wrap to keep it moist. Leave it on for the recommended time (usually 20-30 minutes).
- Rinse and Observe: Rinse the hair thoroughly with water to remove the bleach. Observe the color change. High-quality human hair should lighten evenly and show minimal damage.
- Condition the Hair: Apply conditioner to the bleached hair sample to restore moisture and softness.
Blacklight Test
Shine a blacklight on your hair extensions to identify synthetic hair.
Materials You'll Need:
- A blacklight (UV light)
Steps:
- Prepare the Sample: Ensure the hair extension is clean and dry.
- Turn on the Blacklight: Turn off other lights in the room to create darkness.
- Observe the Glow: Shine the blacklight on the hair extension. High-quality human hair will not glow or fluoresce under the blacklight. Synthetic hair may exhibit a distinct glow or fluorescence.
Cuticle Test
Check for the cuticle layer's presence by running your fingers down the strand's length.
Materials You'll Need:
- A small sample of the hair
Steps:
- Prepare the Sample: Take a small sample of the hair. It should be clean and dry.
- Run Your Fingers: Hold the hair sample between your thumb and forefinger. Run your fingers down the length of the strand.
- Feel the Texture: Observe the texture and resistance. High-quality human hair with intact cuticles will feel smooth and have slight resistance when running your fingers downwards. Synthetic hair or hair with stripped cuticles will feel overly smooth or slippery.
Step 3: Knowing the Types of Clip-Ins for Various Hairstyles
When it comes to achieving different hairstyles with clip-in extensions, knowing the types and styles of clip-ins available is essential. Here are some popular options:
Types of Clip-Ins
1. Classic Clip-In Extensions
Classic clip-in extensions are the most common type, offering versatility for various hairstyles. They come in multiple lengths, textures, and colors to match natural hair seamlessly. These extensions typically consist of wefts with clips attached for easy installation and removal. They are ideal for adding length and volume to your hair without permanent changes.
2. Ponytail Clip-In Extensions
Ponytail clip-in extensions are designed specifically for creating voluminous ponytails. They come with a built-in clip or a Velcro strap to secure the extension around your natural ponytail. These extensions add length, thickness, and a polished look to your ponytail, making them perfect for special occasions or daily wear.
3. Seamless PU Clip-in extensions
Seamless PU clip-in extensions are designed for those seeking a flawless, natural look. These extensions feature a thin polyurethane (PU) weft that lies flat against your scalp, ensuring they blend seamlessly with your natural hair. They come with discreet clips that secure the extensions in place, providing a comfortable and secure fit. Seamless PU clip-ins add length, volume, and a smooth finish to your hairstyle, making them ideal for everyday wear or special occasions when you want to look your best.
4. Tape-In Extensions
While not technically clip-ins, tape-in extensions are worth mentioning for their semi-permanent nature. They involve sandwiching sections of natural hair between adhesive wefts. Tape-in extensions provide a seamless and natural look, making them a popular choice for those seeking a more long-term solution.
Styling Techniques with Clip-Ins
Achieving different hairstyles with clip-in extensions is made easier with various styling techniques. Here are some popular styles:
- Adding Volume and Length
- Step-by-Step Guide:
- Start by sectioning your hair horizontally from ear to ear.
- Clip in the extensions starting from the nape of your neck, working your way up.
- Ensure the wefts are evenly distributed for a natural look.
- Blend the extensions with your natural hair using a comb or brush.
- Tips and Tricks:
- Use extensions that match your hair color and texture for a seamless blend.
- Curl or straighten both your natural hair and extensions for a unified look.
- Consider layering the extensions for added volume and movement.
- Creating Updos and Braids
- Step-by-Step Guide:
- Section your hair as needed for the specific updo or braid style.
- Clip in the extensions to the sections where you need extra volume or length.
- Style your hair as desired, incorporating the extensions into the updo or braid.
- Secure the hairstyle with bobby pins or hair ties.
- Tips and Tricks:
- Opt for extensions that match your hair color for a cohesive updo or braid.
- Use extensions with a slightly wavy or curly texture for added grip and volume.
- Experiment with different updo and braid styles, such as buns, fishtail braids, or crown braids.
- Enhancing Ponytails and Buns
- Step-by-Step Guide:
- Gather your natural hair into a ponytail or bun at the desired height.
- Attach the ponytail clip-in extension around your natural ponytail.
- Wrap a small section of hair around the base of the ponytail to conceal the clip.
- Secure the wrap with bobby pins for a polished finish.
- Tips and Tricks:
- Choose extensions that match your hair color and texture for a seamless look.
- Add volume to your ponytail or bun by teasing the roots before attaching the extension.
- Experiment with different ponytail and bun styles, such as high ponytails, low buns, or braided buns.
Step 4: Professional Hair Care Guide for Clip-Ins
Maintaining the quality and longevity of your clip-in hair extensions requires proper care and maintenance. Here is a professional hair care guide to ensure your extensions stay healthy and beautiful.
Washing and Conditioning
- Frequency: Wash your extensions every 10-15 wears or as needed to remove product buildup and maintain cleanliness.
- Products: Use sulfate-free and paraben-free shampoos and conditioners to prevent drying and damage.
- Technique: Gently detangle the extensions before washing. Apply shampoo and conditioner from mid-length to ends, avoiding the roots where the clips are attached.
- Rinsing: Rinse thoroughly with lukewarm water to remove all product residues.
Detangling and Brushing
- Tools: Use a wide-tooth comb or a detangling brush to avoid breakage and shedding.
- Technique: Start detangling from the ends and work your way up to the roots, gently removing knots and tangles.
Drying and Styling
- Air Dry: Allow your extensions to air dry naturally to prevent heat damage.
- Heat Protectant: If you need to use heat styling tools, apply a heat protectant spray to minimize damage.
- Low Heat: Use the lowest heat setting possible when using flat irons, curling irons, or blow dryers.
Storage
- Clean and Dry: Ensure your extensions are clean and completely dry before storing them.
- Storage Container: Store the extensions in a breathable storage container, such as a satin or silk bag, to prevent tangling and damage.
- Avoid Sunlight: Keep the extensions away from direct sunlight and excessive heat to maintain their quality.
Nighttime Care
- Remove Extensions: Take out the clip-in extensions before going to bed to prevent tangling and breakage.
- Braid or Twist: If you prefer to sleep with the extensions in, braid or twist your hair to minimize tangling and friction.
- Silk Pillowcase: Use a silk or satin pillowcase to reduce friction and maintain the smoothness of your hair and extensions.
Conclusion
Choosing high-quality clip-in hair extensions and properly caring for them ensures you achieve the desired look while maintaining the health and longevity of your extensions. By understanding the types of clip-ins, testing their quality, and following professional care guidelines, you can confidently enhance your hairstyle with beautiful and durable extensions.
For premium quality clip-in hair extensions that meet your needs, visit elfinhair.com. Explore a wide range of options and elevate your hairstyle game with confidence!
Related Articles:
Tips To Help Natural Hair Growth Under Extensions
7 Simple Half Braid Hairstyles with Extensions
Top 10 Trending Hair Colors For Black Women 2024
Is a Quick Weave Better Than a Sew-In Weave?