How To Make a Lace Front Wig?
Like every girl, do you want to have cheap lace front wigs? If so, we have a solution for you; make the lace front wig on your own! Are you thinking about the process to make it? We are explaining it here completely and in easy words. But before that, let's have a look at some of the basics about lace front wigs to get an idea of why you need them. So, let's start.
1. What Is a Lace Front Wig?
As the name indicates, lace is part of wig construction. The lace part is placed at the front hairline that has hair attached by hand, including baby hair that creates the illusion that hair is coming out of the scalp. Therefore, lace front wigs are best for beginners as they have a fear that the wig will be noticeable by the people because of its abrupt and sharp hairline. This wig helps you create a soft, undetectable hairline. Other than lace at the front, which covers the whole front hairline, there's a wig cap in the wig construction that covers the rest of the head.
Today's wigs' realism and easy-to-install structure make it not only a favorite to people suffering from hair loss, but it's famous for fashion now.

2. Features of Lace Fronts:
Lace fronts have amazing features that provide various benefits. Following are those.
2.1 Undetectable:
Since the lace attached to it is very thin and has baby hair, therefore, when melted in the skin, it becomes completely invisible. It helps you set a completely new natural hairline.
2.2 Lightweight:
As compared to other traditional wigs in the market, lace fronts are more lightweight. That's why wigs do not weigh down, and it doesn't go back from the front hairline.
2.3 Breathable:
Lace fronts have more lace than numerous other wigs that offer high breathability. So, if a woman is going through hair treatment or can't tolerate heat because of hormonal changes, then lace front wigs are excellent.
2.4 Flexible in Styling:
In lace front wigs, hair is hand-tied on lace; you can move them like natural hair. Moreover, the lace in it is wide from ear to ear and can be long till the crown of the head. You can form any slick back hairstyles or create natural partings to make different hairstyles.
3. Steps to Make a Lace Front Wig:
Things you need:
· Lace frontal 13x4" or 13x6."
· Three bundles
· Curved needle
· Nylon thread
· T-pins
· Canvas head of your head size
· Mesh dome wig cap of your size
Step 1: Set Up Things:
Apply a mesh dome wig cap on the canvas head. Get the t-pins ready.
Take a 13x4" lace frontal and bleach the knots. If you think the color gets too brassy, use neutralizer shampoo to get the desired results. Then, scoop out the few strands on the whole hairline of the wig and start plucking to make it natural. Don't over-pluck. Otherwise, it starts looking bald.
Step 2: Secure The Frontal:
Now it's time to tack down the frontal on canvas head. Put the frontal on the canvas head, tighten the lace, and determine where the ear can be. Use t-pins to secure the edges of the lace frontal from where the hair starts to the elastic band of the wig cap on both sides.
Then secure the wig's hairline to the wig cap in a way the elastic is not visible. So, put the wig an inch below the elastic and secure it there.
Step 3: Sew The Frontal in Its Place:
Now fold all hair and clip them on the top-front of the canvas. If the back of the canvas is bulging out, it means you have set lace frontal well.
Remove the t-pin from one side to start sewing the frontal. Start sewing on the elastic band but use only its upper mesh fabric to secure the wig, then sew the frontal on the mesh cap. Otherwise, if you sew, taking the whole elastic, the cheap human hair lace front wig you are making will not fit on your head properly.
Step 4: Add Bundles:
After sewing the lace frontal, you need to sew the bundles. Start sewing bundles from the back, bottom of the canvas. You can opt to start sewing from mesh material of elastic band or from above. When sewing on the back, you can use double tracks without cutting them, with a fold-over method.
When you reach the crown of the head, you should use single tracks without doubling them. And on the top of the head, to stop the round shape from forming, cut a small track and sew it in the straight form above the deepest track shape. It will make the top of the head look natural.
When you reach on the top and super close to the frontal's back, where only one track can be installed, sew the track and bundle join perfectly but not overlap.
Step 5: Cut The Excessive Wig Cap Underneath:
Fold the wig cap upside, cut the wig cap till where the lace is present, or from where you had started sewing the bundles. Now unclip the hair that you folded when installing bundles.
Step 6: Now Style and Wear the Wig:
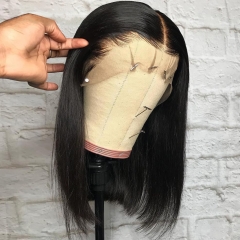
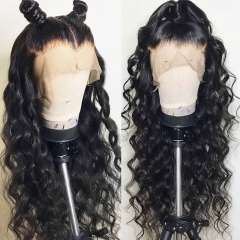
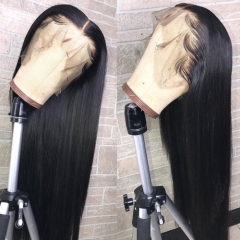
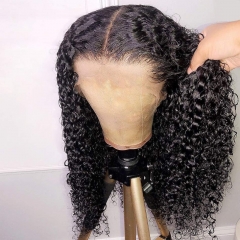
Now, use mousse to give the hair shape you want, and use curler and straightener to give hair sleek and proper style.
 |
 |
 |
 |
 |
 |
4. How Long Does a Lace Front Wig Last?
Elfin human hair lace fronts wigs are cheap and of high quality; that's why they last longer than 12 months if you want your created wig to also last longer, purchase bundles and the frontal wig from Elfin Hair.
5. How to Stop Lace Front Wigs from Itching?
1. Choose a flexible and soft wig cap.
2. Purchase high-quality lace front wig
3. Shampoo your wig frequently
4. Rinse it thoroughly
5. Use products designed for dandruff
6. Use cotton or silk wig liner
7. Apply natural hair products
6. Where to Buy Human Hair Lace Front Wigs?
Elfin Hair is an emerging online wig brand with lots of trusted and returning buyers. You can also enjoy the realism, comfort, and longevity that Elfin Hair's lace front wigs.
Related article:
How long does a human hair lace front wig last?
What do You need to Know About Lace Front Human Hair Lace Wigs?
How to Apply a Lace Front Human Hair Wigs?
Bleached knots on frontals, closures, and lace wigs
How to protect your hair under a wig?

 USD
USD EUR
EUR GBP
GBP CAD
CAD AUD
AUD


