How To Create Bantu Knots With Weaves?
Bantu knot is an African hairstyle that has been in vogue for decades. This style is stunning and chic. Apart from that, it serves as a protective hairstyle to protect your hair from damage. But Bantu knots might be a bit tricky to create. Besides, only a few people know how to make this style with weaves. This is why we have come up with this guide on how to create Bantu knots with weaves. But before we dive into how to make this style, what are Bantu knots?

What are Bantu Knots?
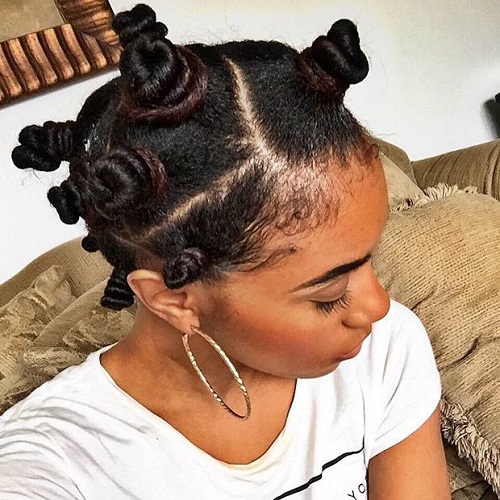
As we said earlier, the Bantu knot is an African hairstyle that has been popular among African women over the years. Even though it is called Bantu knots, there are no knots in the style. The style is formed by twisting your natural hair and forming coiled buns. Bantu knots are protective hairstyles that protect the hair from breakage or damage. Besides, this style helps retain moisture, keeping your hair hydrated.
Do Bantu knots damage your natural hair?
Bantu knots do not damage your natural hair. Rather, they help protect the hair from breakage or damage. This hairstyle also prevents frizziness. But, if not done well, it could cause some damage. For instance, if you twist your hair too tight, it could add tension to your scalp. And this could pull out your natural hair if care is not taken. So, if you feel the coil is too tight, you should remove it and re-twist it a little bit loosely to avoid hair damage.
How to do Bantu knots with extensions?
Many people struggle with creating Bantu knots because of their short hair. If you want to create Bantu knots on short hair, you should consider using extensions. Here is a step-by-step process of how to create Bantu knots with extensions:
Items you need:
- Moisturizing shampoo and conditioner
- Wide-tooth comb
- Leave-in conditioner
- Gel
- Edge control
- Rattail comb
- Elastic bands
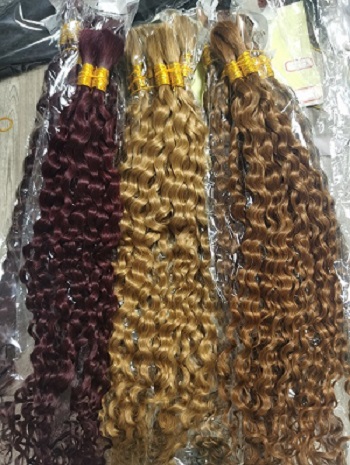
- Human hair extensions

Step 1: Start with clean hair.
Before creating Bantu knots on natural hair, you should ensure your hair is clean. So wash your hair with a cleansing shampoo. This will ensure that your hair is free of sweat, dirt, and product buildup. After that, you should condition it with a moisturizing conditioner. This will help you keep your hair hydrated.
Step 2: Moisturize and detangle
The next step is to moisturize your hair. When your hair is well hydrated, it will be in good condition. Besides, you might not be able to condition it while it is in Bantu knots, so you should ensure you moisturize generously. To do this, you can use a hair mist to keep moisture in your hair. The next thing is to take a wide-tooth comb and use it to detangle your hair. You will have to part your hair into different sections to create this style. Thus, there must be no hindrances in the form of tangles or knots. Detangling helps you get rid of this. Then leave your hair to air dry.
Step 3: Section your hair
Your hair is now clean, smooth, and dry; the next step is to section it. You should part your hair into different sections. The number of sections depends on how dense your hair is and, of course, your preference. You can decide to make the sections square or triangle-shaped. Just try out the one you are most comfortable with. Then pick out a section and apply some leave-in conditioner to it. Remember, it is essential to keep your hair hydrated. Apply styling gel to the root of that section and comb with a fine-tooth comb. After that, you should secure it tightly (not too tight) with an elastic band. Then repeat this process for every other section.
Step 4: Attach the extensions and braid
The next step is to attach the extensions to your hair and braid. You can get the high-quality extensions that you desire at Elfin Hair. Take your extension and fold it into four equal parts. Then cut out one part, as you do not need too much extension for this style. Gently pull the extension to remove the blunt edges, and cream and brush it till it is smooth. Pinch out a section of the extension that you need to braid your hair. Then attach it to your hair just above the elastic band and start braiding your natural hair. Braid until you reach the end of your natural hair.
Step 5: Twirl and coil
Once you get to the end of your natural end, twirl the remaining extension to the end. Then coil it around your hair. Because the end of the extension is not blunt, you can easily tuck the end underneath your Bantu. On the other hand, you can secure it with an elastic band.
Step 6: Finish up
Then repeat steps 4 and 5 on other sections of your hair till you have covered your whole head. And voila! You have created Bantu knots with weaves. You can decide to accessorize your Bantu knots by using colored bands to make them colorful.
Here is a video tutorial about how to do Bantu knots with weave:
How long can Bantu knots last?
Some people are probably wondering whether Bantu knots can last long. Well, Bantu knots on natural hair can last for about two weeks. And this depends on how tight it is (remember, not too tight) and how well you take care of it. Besides, when you loosen Bantu knots on natural hair, it forms curls that you can carry for about two days with proper maintenance. On the other hand, Bantu knots with braiding hair can last for about three weeks. This also depends on how well you take care of it.
Final Thoughts:
Bantu knots have been in vogue for years, and they are not showing signs of going out of trend. You can achieve this look with long, natural hair. But you will need weaves if you have short hair. We believe that this guide on how to create Bantu knots with extensions will guide you the next time you want to try out this hairstyle. If you are looking for where to get quality extensions to make Bantu knot hairstyles, Elfin Hair is your go-to place.
Related Posts:
Comprehensive guide to dyeing hair extensions
How To Hide Extensions In Very Short Hair?
Tutorial: Quick & Easy Jumbo Box Braids!
Top 10 High Ponytail Hairstyles For Black Women

 USD
USD EUR
EUR GBP
GBP CAD
CAD AUD
AUD


